7 steps to build a serverless contact form
With React, AWS Lambda, SES & API Gateway
In the era of the cloud and static websites we can launch small websites and blogs virtually in 30 minutes. With this in mind, we are going to explore how to create a serverless contact form in 7 simple steps using Amazon Web Services.
There are about a dozen different ways to create a serverless contact form and probably as many tutorials. However, in these tutorial I'll aim to list a clear number of steps to achieve that by following best practises and setting up the AWS infrastructure without the assistance of a library.
What are we building?
A simple contact from using React and Formik.
An endpoint using API gateway that we will send our form data.
An AWS lambda function which will be triggered by the API and send an email with the form data in your inbox using Amazon's Simple Email Service.
Before we start, you will need to have the following:
An AWS account.
The AWS CLI installed on your computer
Step 1: Create your form UI
I've choose to setup my contact form using React and Formik but you can use any other library or framework to do so. Here is the code. Notice the form is making a POST request to an endpoint AWS_CONTACT_FORM_API that we will build later on using API gateway.
Step 2: Create your AWS Lambda function
Go ahead and login in AWS Management Console. Create a Lambda function from scratch. Note: Make sure you do that on the correct region.
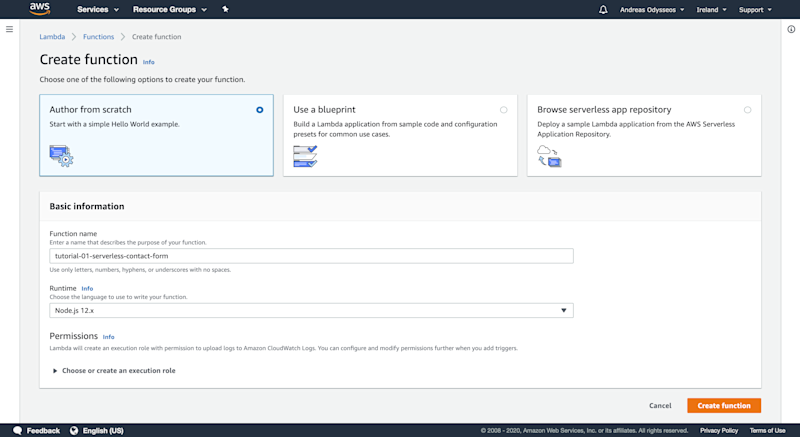
Bellow is a snippet of our new function. Notice the following:
We have separated the code logic from the handler to make a more unit-testable function.
We've set two environment variables SENDER, RECEIVER. We use those to define the email address that our function will send out the email from and the inbox that the contact form will land in.
NOTE: make sure your receiver email has been verified using VerifyEmailIdentity
Create your function and trigger your first test. This should return a failed attempt as we haven't yet gave permission to our function to use SES.
Step 3: Give your Lambda function permission to use SES
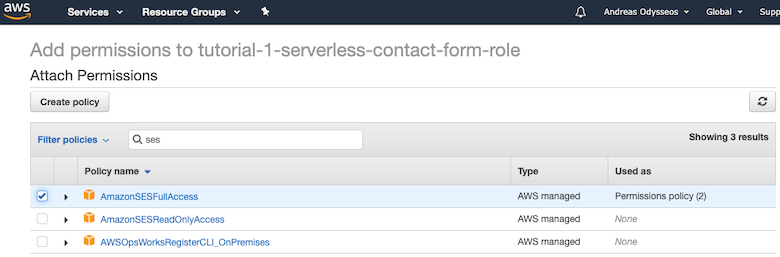
Go to the Permissions tab and click on the Role name under Execution role. That should bring up the IAM Management Console. Add a new policy AmazonSESFullAccess.
Once you've done that, trigger the Lambda test again. It should successfully send an email to your RECEIVER address!
Step 4: Create an API Gateway
The last part is to create an API-endpoint using API gateway which we will use to make POST requests from our form.
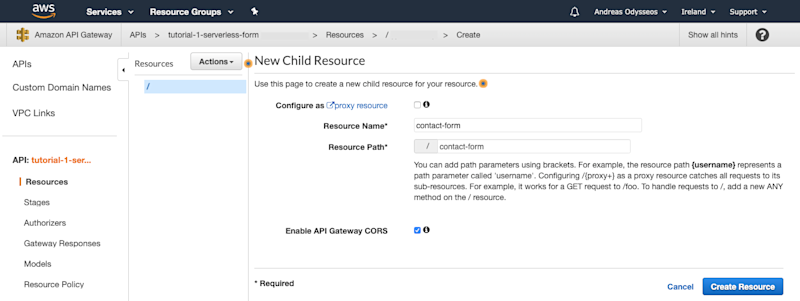
Go to API Gateway and create a REST API, then create a Resource.
Step 5: Connect the API Gateway with your Lambda Function
Now that we have our endpoint we can connect it to the lambda. From the Resource action create a new POST method and integrate it with
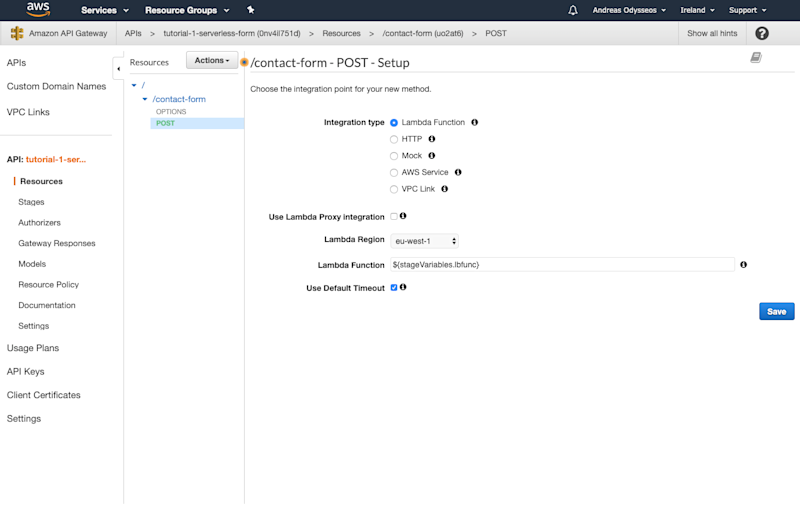
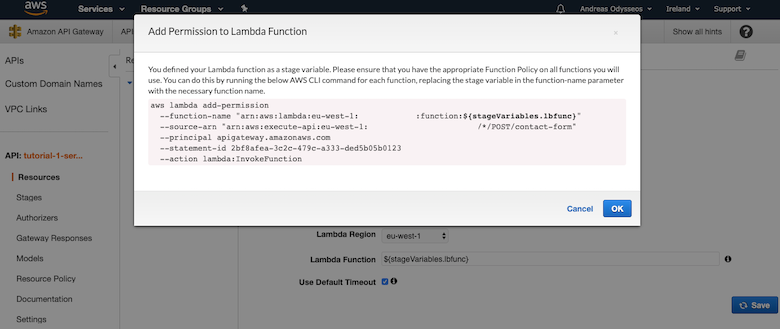
Once you have defined your Lambda function as a stage variable you will be asked to add the permission to the function. The easiest way to do that is from the AWS CLI. So, on your terminal run the command and make sure to replace the stage variable with your Lambda name. To verify that this step was successful, you should be able to see in your Lambda function under permissions the Resource-based policy.
Step 6: Deploy, deploy deploy
From Actions select to enable CORS and then Enable CORS and replace existing headers. Then, from actions again select Deploy API. Use the New Stage option and name is
Note: you can deploy your API multiple times and create different environments.
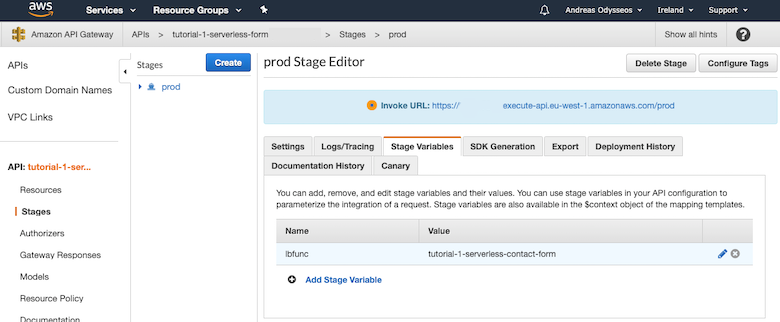
You can now set your stage variable lbfunc to point to your Lambda function. This will tight your endpoint stage to the specific function.
Step 7: Use your newly build API endpoint to post your form
Thats it! Copy the invoke URL and replace in your form request. Make sure to include the method part at the endpoint.
https://{api}.execute-api.eu-west-1.amazonaws.com/prod/contact-formYour form should now be sending emails in your inbox!